
# vuepress 构建自己的项目笔记
偶然发现一个 Markdown 文档生成的利器,也是 vue 官网推荐的一个工具 vuepress (opens new window)
# 初体验
官网的 快速上手 (opens new window) 能教你怎么快速的看到一个主页面。这里总结下步骤
TIP
本教程对于 vuepress 的说明是 0.x 版本的,现在 vuepress 是 1.5.x 了,所以部分配置可能不适合;
通用的有:部署到 gh-page、在 md 中使用 vue
1.5.x 分支模板:可以直接用来快速创建一个常用的新笔记仓库:https://github.com/zq99299/mq-tutorial/tree/vuepress-tpl
创建一个项目
创建目录:vuepress-demo
并用 npm init 命令初始化一个 packagen.json 文件出来。初始值如下

  {
    "name": "vuepress-demo",
    "version": "1.0.0",
    "description": "vuepress 使用测试",
    "main": "index.js",
    "scripts": {
      "test": "echo \"Error: no test specified\" && exit 1"
    },
    "author": "",
    "license": "ISC"
}
1
2
3
4
5
6
7
8
9
10
11
12
13
14其实这里都不是罪重要的。最重要的是添加 依赖和设置入口
添加依赖和设置入口
{
  "name": "vuepress-demo",
  "version": "1.0.0",
  "description": "vuepress 使用测试",
  "scripts": {
    "docs:dev": "vuepress dev docs",
    "docs:build": "vuepress build docs"
  },
  "devDependencies": {
    "vuepress": "^0.14.2"
  }
}
1
2
3
4
5
6
7
8
9
10
11
12
13并使用
npm install命令安装 vuepress 依赖首页编写
随意写一点内容即可
目录结构如下:
| - docs
 |- README.md
1
2
3运行
npm run docs:dev这个开发模式,有一个功能就是:会监控 docs 目录下的文档修改,会自动编译(可以想象成 vue 项目中的热更新); 但是一般是不需要编写边看生成的站点的,这个看个人爱好,我喜欢用 atom 编写,生成的时候才用 vuepress 来生成站点
# 简单配置
这些看官网文档即可,讲得很详细了,这里我想说一些注意事项:
首先只要是 docs 目录下的所有 md 文档都会被解析成 html ,这个可以在浏览器中直接输入地址查看效果
侧边栏的显示是需要在 config.js 中配置的。
侧边栏中配置的一个 title 相当于是一个根的侧边栏展示。
如下面贴出的配置,写了两个 title ,访问 http://localhost:8080/vue-press/ 的时候 侧边栏展示的只是该 vue-press 配置中 children 的所有抓取到的标题。
主页文件中怎么使用图片?
docs/.vuepress/public把图片放在这个目录下,则可以直接使用 /xx.png 访问到md 文件中引用图片注意事项
- 可以把图片放在 public 全局目录下
- 也可以把图片放在与 md 相同目录下,但是引用图片就的使用相对路径了,如
./xxx,png
比如下面的侧边栏配置,主要配置是 docs/.vuepress/config.js 文件
module.exports = {
    title: 'Hello VuePress',
    description: 'Just playing around',
    sidebar: 'auto',
    themeConfig: {
        docsDir: 'docs',
        nav: [ // 配置顶部导航栏的条目
            {text: 'Home', link: '/'},
            {text: 'vue-press', link: '/vue-press/'},
            {text: 'demeter', link: '/03_design_principles/demeter.md'},
            {text: 'External', link: 'https://google.com'},
        ],
        sidebar: {
            // 配置侧边栏
            '/vue-press/': genSidebarVuePress(),
            '/03_design_principles/':
                genSidebarConfig("设计模式")
        }
    }
}

function genSidebarVuePress() {
    return [
        {
            title: 'vue-press',
            collapsable: false,
            children: [
                ''
            ]
        }
    ]
}

function genSidebarConfig(title) {
    return [
        {
            title,
            collapsable: true,
            children: [
                '',
                // 注意这里,可以写md后缀,也可以不写,也能获取到
                'composition_aggeregation',
                'demeter',
                'dependency_inversion.md',
                'interface_segregation.md',
                'liskov_substitution.md',
                'open_close.md',
                'single_responsibility.md',
                '本章导航.md'
            ]
        }
    ]
}

/*
这个语法就需要自己吧所有路径拼写完整;上面的语法则不需要相当于有一个基础的路径
[
    {
        title: '设计原则',
        collapsable: false,
        children: [
            '',
            // 这里的文档全路径其实就是 docs/03_design_principles
            '/03_design_principles/composition_aggeregation.md',
            '/03_design_principles/demeter',
            '/03_design_principles/dependency_inversion.md',
            '/03_design_principles/interface_segregation.md',
            '/03_design_principles/liskov_substitution.md',
            '/03_design_principles/open_close.md',
            '/03_design_principles/single_responsibility.md',
            '/03_design_principles/本章导航.md'
        ]
    }
]*/
2
3
4
5
6
7
8
9
10
11
12
13
14
15
16
17
18
19
20
21
22
23
24
25
26
27
28
29
30
31
32
33
34
35
36
37
38
39
40
41
42
43
44
45
46
47
48
49
50
51
52
53
54
55
56
57
58
59
60
61
62
63
64
65
66
67
68
69
70
71
72
73
74
75
# 其他配置参考官网即可
vuepress (opens new window) 的文档也是使用 vuepress 编写的,
所以最好的学习方式就是查看他的源码,文档很少,但是配置中有使用 vue 组件的。已经很完善了
vuepress 项目地址: https://github.com/vuejs/vuepress/tree/master/docs
# 在 md 中使用 vue
https://vuepress.vuejs.org/zh/guide/using-vue.html
官网中有详细的介绍,这里简单说明下:
添加依赖
"vuepress-theme-vue": "~1.1.0"
docs/.vuepress/components 目录下编写 vue 模板。
如有一个 Demo-01.vue 的模板
那么 在 md 文件中可以直接写 <Demo-01>
2
注意:使用了 vue 的话,会在左上角生成一个广告位
# 部署到 gh-page
官网文档: https://vuepress.vuejs.org/zh/guide/deploy.html#github-pages
这里粘贴下我这个项目的 deploy.sh 内容,比较简单,每一步都有中文说明,官网文档可以说是很良心了
#!/usr/bin/env sh

# 确保脚本抛出遇到的错误
set -e

# 生成静态文件
npm run docs:build

# 进入生成的文件夹
cd docs/.vuepress/dist

# 如果是发布到自定义域名
# echo 'www.example.com' > CNAME

git init
git add -A
git commit -m 'deploy'

# 如果发布到 https://<USERNAME>.github.io
# git push -f git@github.com:<USERNAME>/<USERNAME>.github.io.git master

# 如果发布到 https://<USERNAME>.github.io/<REPO>
git push -f git@github.com:zq99299/note-book.git master:gh-pages

cd -
2
3
4
5
6
7
8
9
10
11
12
13
14
15
16
17
18
19
20
21
22
23
24
25
(windown 下)在 webstom 或则 gitBase 里面 可以直接运行 deploy.sh 文件。 最好在 gitBase 里面运行,能显示错误信息。
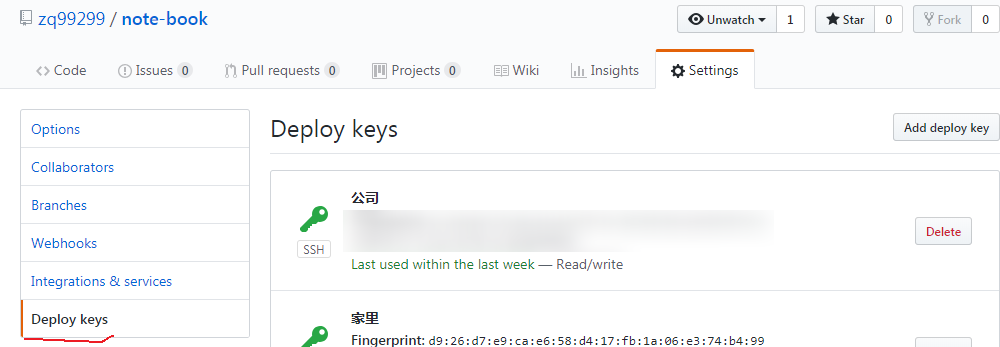
还有一点需要注意的是:使用脚本必须在 gitHub 中添加你本机的 id_rsa.pub(里面的字符串) 公钥。
如下图所示:添加之后执行脚本才能推送到分支上去
id_rsa.pub 的简易生成命令,更多的可以百度
// 一路回车即可,注意看控制台信息,有生成完成的文件路径
ssh-keygen -t rsa -C "邮箱地址"
2
# 可以作为基础项目的分支
这个分支可以直接克隆下来 ,稍微修改,就能使用起来了。快速建立新的笔记项目
建议认真看一遍官网文档,vuepress 不仅可以单独用来生成 markdown 的文档站点,还能在已有的 vue 项目中使用,
换句话说,一个后端系统的使用手册文档就可以使用 vuepress 来构建,这个主意是很不错的。
- 构建站点好看
- 默认主题配置方便
- 使用 atom 来编写,图片插件来弥补 markdown 中插入图片不方便的缺陷
- 脚本方便发布到 gh-page
- 可以写 vue 组件来构建自己特殊的需求,生成站点部署在自己的云主机上
这个简直就是完美的搭配。
分支地址如下:
0.x 分支 https://github.com/zq99299/note-book/tree/vuepress-demo
1.5.x 分支模板:可以直接用来快速创建一个常用的新笔记仓库
https://github.com/zq99299/mq-tutorial/tree/vuepress-tpl